
Quickstart: TMC Script Builder
Welcome to the quickstart guide for the Script Builder r143. This page should give you an overview of the fundamental workings of the program.
Table of Contents
Download and Start Script Builder Window Loading Another XML File Starting a New File Adding a Prefabricated Incident Adding a Custom Incident
Download and Start
You can find the download file on the DownloadPage. It's the second link: "ScriptBuilder Program." Inside the resulting ZIP folder is a directory of prefabricated incidents, and the JAR file to run the program. You can run the program by opening this JAR file, or from the command prompt line by running the command "java -jar ScriptBuilder.jar" from inside the ZIP folder.
Script Builder Window
Upon launching the program, you should see the following screen:

From this window, the flow of the entire script you're currently working on can be observed. The name of the current file can be found at the top of the window; in the example image it is "untitled1.xml".
Loading a previously existing XML file
From the dropdown menu at the top, select "File > Open".

A dialog box will open and ask you to select an existing script. Select your file and press "ok". The file will be loaded into the ScriptBuilder program and will show up on the main screen.
Starting a new file
From the dropdown menu at the top, select "File > New".

The current working file will be set to a new file. The default new-file name is "untitled1.xml", but you will be able to rename the file upon save.
Adding a prefabricated incident
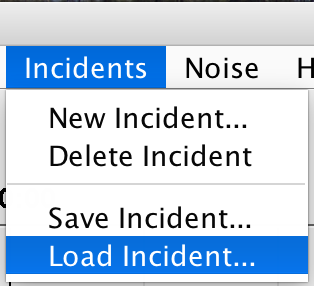
From the dropdown menu at the top, select "Incidents > Load Incident".

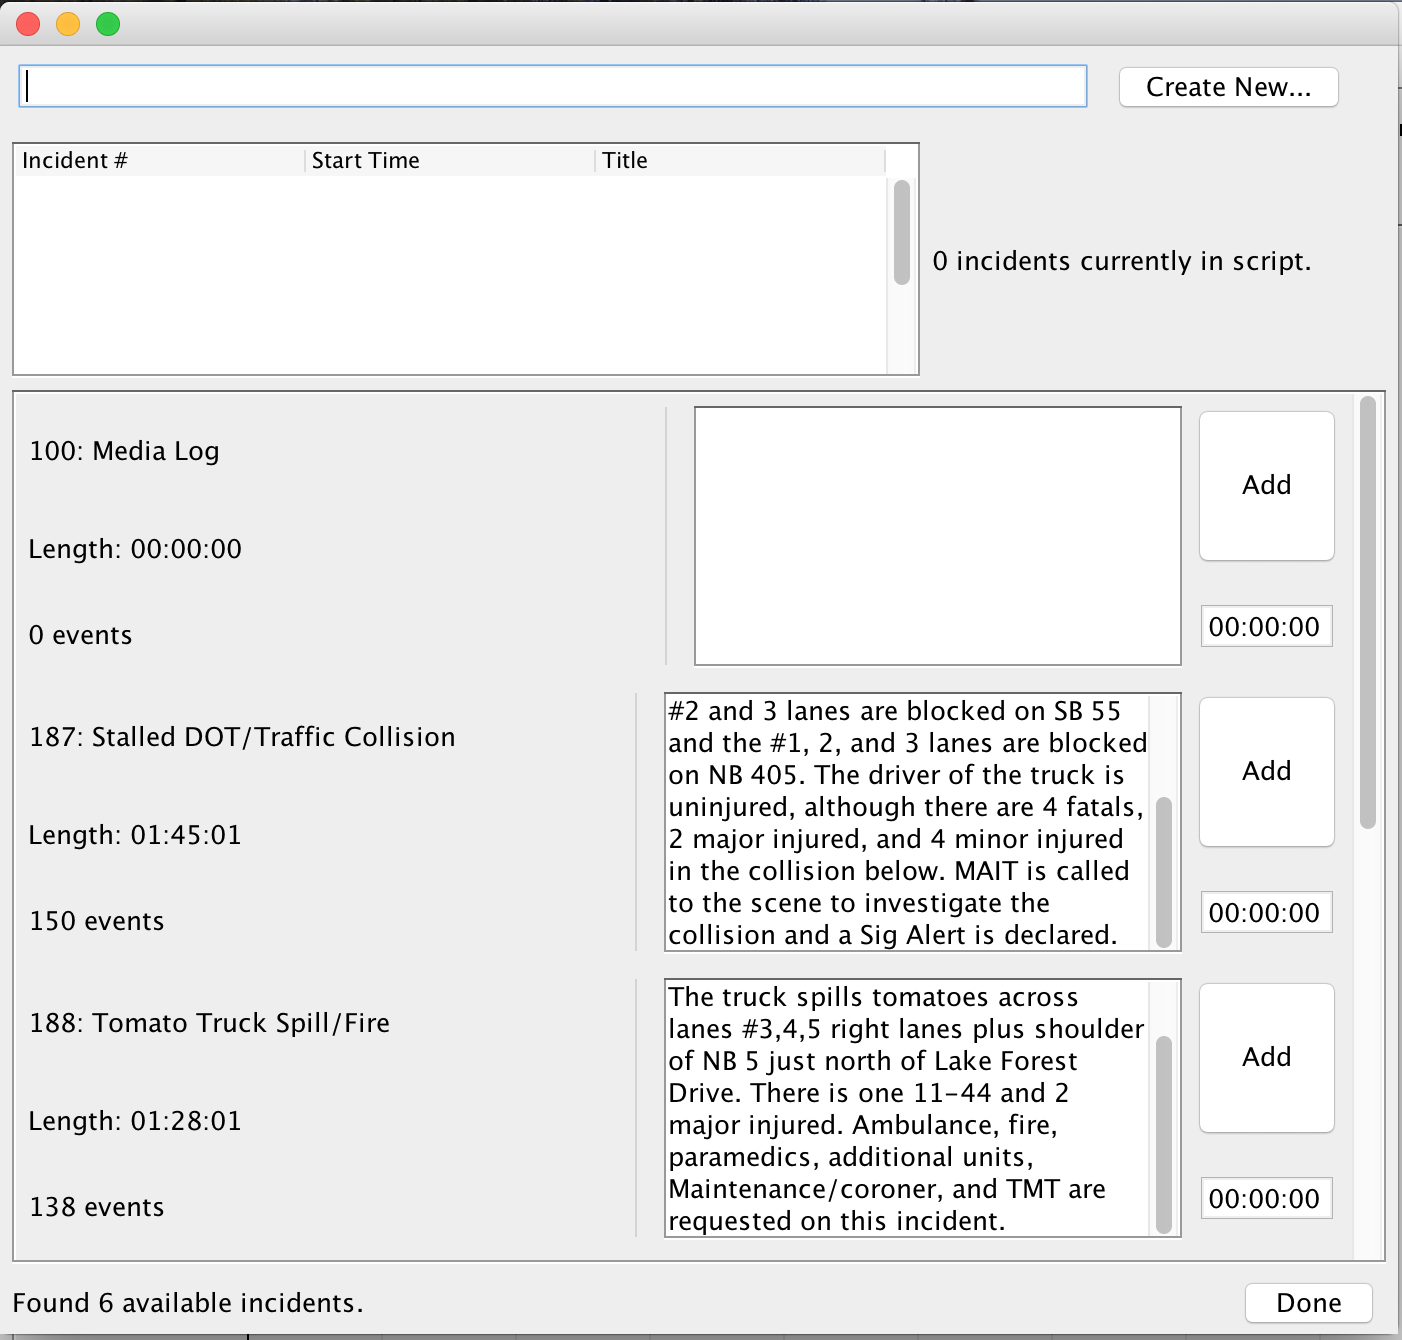
The Incident Palette Window will open and display a list of prefabricated incidents included with the program.

Each incident has an identification number, length, description, and count of associated events. Click the "add" button next to a particular incident to move that incident into the script. The incidents currently in the script will show up in the table at the top of the palette window. Typing a time in the text field below the "add" button (HH:MM:SS) will cause the incident to start at that time when it is added to the script.


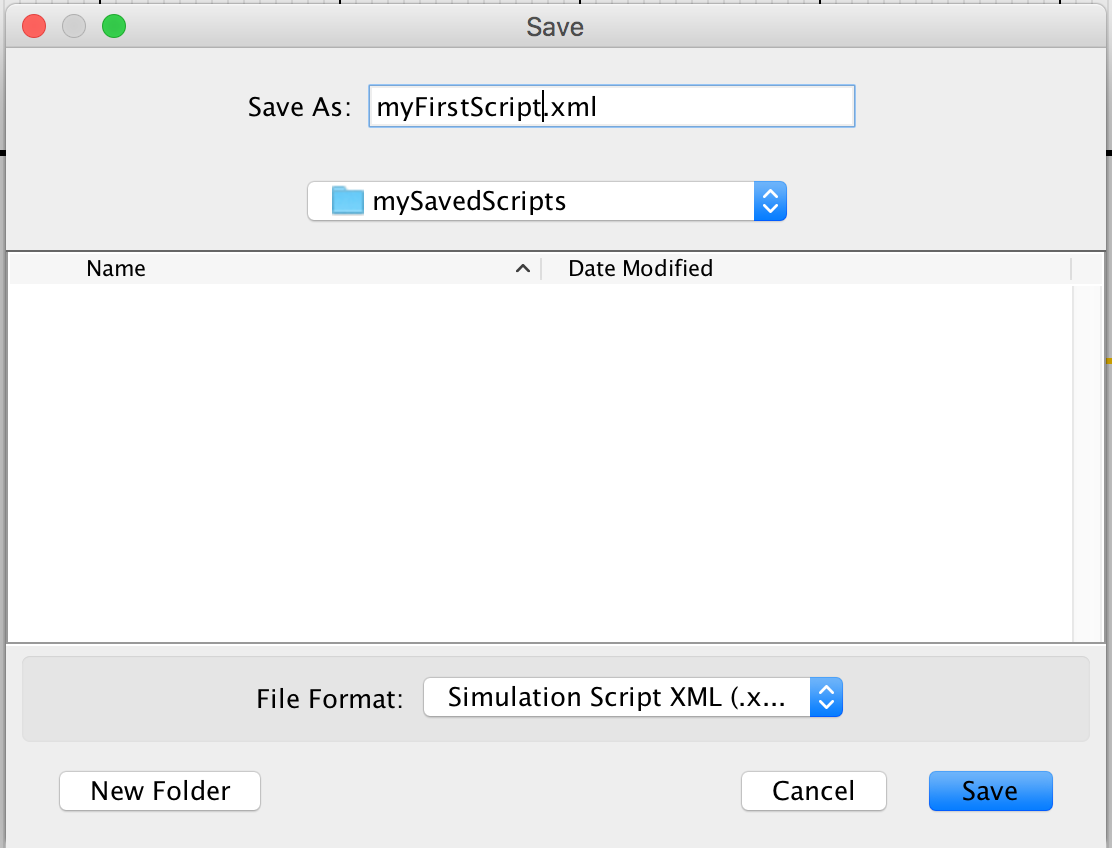
Then, when the load incident window is exited, you should see the three incidents populated in the main ScriptBuilder window. Take this time to save your example script, by either using the shortcut Ctrl-s or by navigating to Scenarios->Save.
Adding Custom Incident
To add a custom incident to the Scenario, navigate to Incidents->New Incident.
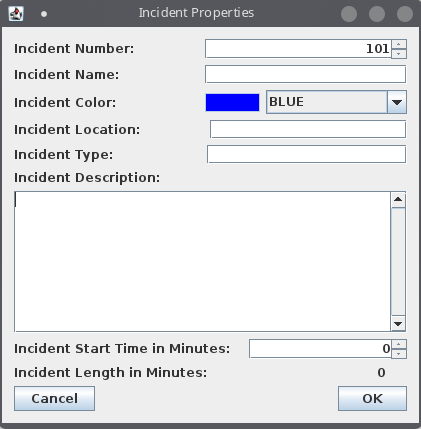
An Incident Properties window should appear as below:

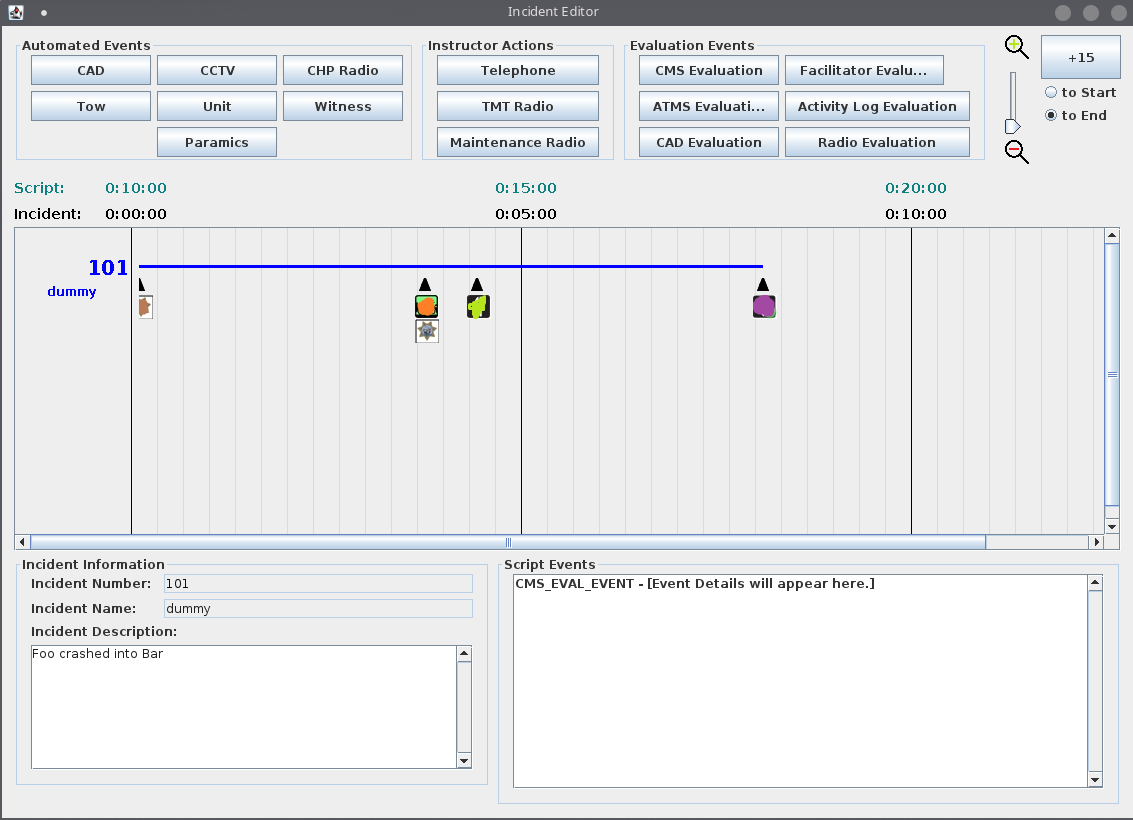
Within this window, add an incident name, location, type, color, and description. The incident length will begin at 0 minutes, but will increase as events are added into the incident. If you would like to move the incident to begin at a different time, enter the time in minutes in the "Incident Start Time in Minutes" box. Upon clicking "OK", the Incident Editor window should appear. Here, you can see that the start time of the incident was changed to 10 minutes, and the information added in the Incident Properties window is populated in the Incident Information box.
![]()
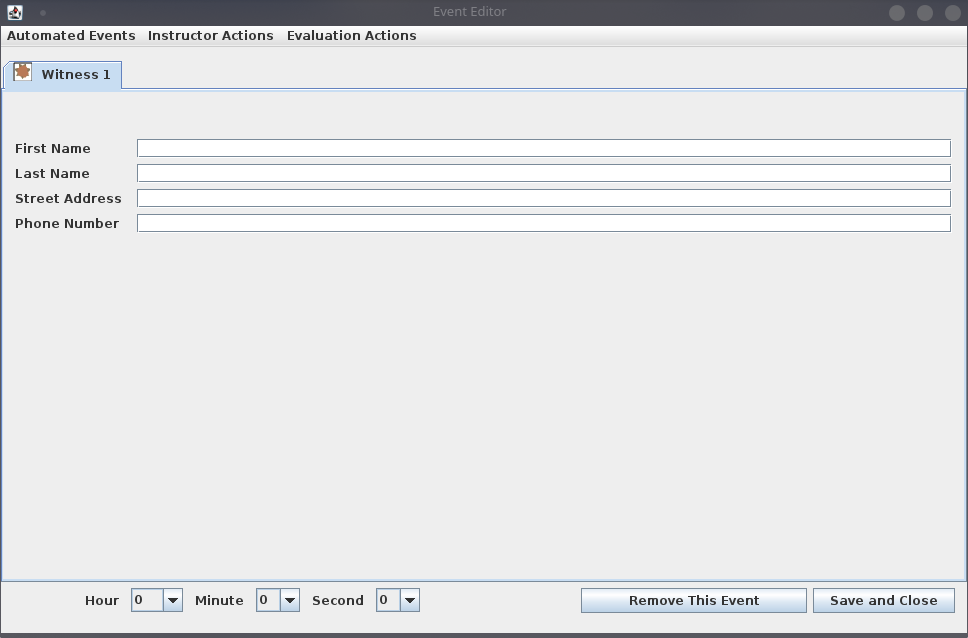
Next, in order to have the Incident actually contain time and events, events, such as the Tow, Unit, and Evaluation events need to be added to the timeline. The first event added will always be at the beginning of the incident. To add your first event, select one of the events from the array of buttons (in this case we will be selecting Witness event). The event-specific event editor window should appear like this:

After filling in the event and clicking "Save and Close", it should be added to minute 0 of the Incident.
After adding a few more incident types to the timeline, it should look something like this:

Then, when finished adding all of the events, the Scenario Overview window should re-populate with black triangles representing each of the events added in the Incident.
Attachments
-
SBMAINSCREEN_START.png
 (128.2 KB) -
added by bmcguffin 9 years ago.
(128.2 KB) -
added by bmcguffin 9 years ago.
-
FILE_NEW.png
(25.3 KB) -
added by bmcguffin 9 years ago.
-
FILE_OPEN.png
(26.3 KB) -
added by bmcguffin 9 years ago.
-
FILE_SAVE_AS.png
(26.9 KB) -
added by bmcguffin 9 years ago.
-
HEADER_CHANGE.png
(15.2 KB) -
added by bmcguffin 9 years ago.
-
INCIDENTS_LOAD.png
(28.1 KB) -
added by bmcguffin 9 years ago.
-
PALETTE_1.png
(214.1 KB) -
added by bmcguffin 9 years ago.
-
PALETTE_ADD_BTN.png
(8.7 KB) -
added by bmcguffin 9 years ago.
-
PALETTE_INC_TABLE.png
(38.4 KB) -
added by bmcguffin 9 years ago.
-
PALETTE_START.png
(205.6 KB) -
added by bmcguffin 9 years ago.
-
SAVE_AS.png
(73.1 KB) -
added by bmcguffin 9 years ago.
-
SBMAINSCREEN_WITH_INCIDENTS.png
(184.2 KB) -
added by bmcguffin 9 years ago.
-
SBMAINSCREEN_ZOOMED_OUT.png
(176.0 KB) -
added by bmcguffin 9 years ago.
-
INCIDENT_PROPERTIES.png
(20.8 KB) -
added by sdanthin 5 years ago.
Image of Incident Properties Window
-
INCIDENT_EDITOR_EMPTY.png
(41.7 KB) -
added by sdanthin 5 years ago.
-
WITNESS_EVENT_EDITOR.png
(35.6 KB) -
added by sdanthin 5 years ago.
-
INCIDENT_EDITOR_ITEMS.png
(49.9 KB) -
added by sdanthin 5 years ago.


